Masks
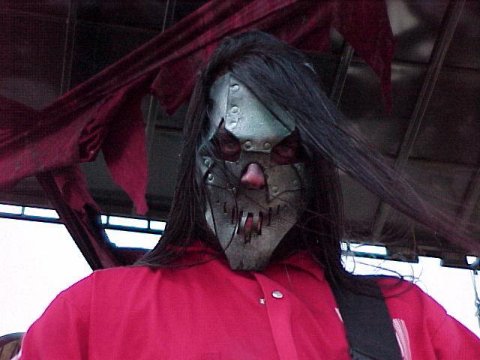
Mick has several masks, one is a modified hockey mask, painted a yellowish gold with more custom features. His other is a mask made to look like metal, but is actually made from black leather.
How To Make Mick's Masks:
To prevent a waste of leather, draw the design onto some paper, when you have all the paper pieces perfect, attach it to the leather and cut the leather out. To make sure the paper mask will work, staple it all together. There are 5 visible pieces to Mick's mask, the forehead piece, two side pieces, under the eye piece and the mouth. Mick's mask is made of leather and has no specific colour (sprayed dif colours). Don't cut out the eye, nose and mouth holes straight away.
Firstly, the forehead piece, as mentioned, measure some paper on your forehead first, and use it as a guide for cutting the leather. Do this before every step. Now, rivet around the forehead. There are four (or three, if you have a small forehead) to each side, and two at the middle, bottom.
Now, do the sides. While doing this, REMEMBER TO LEAVE EXTRA LEATHER for when you will overlap it! The top- side parts have to tuck under the left and right sides of the forehead piece. The under eye section will tuck under the lowe forehead part and the side parts, and the mouth piece goes under everything.
Now that you have that in mind, cut them out in paper, then leather, then add the "circles". Don't worry about the eye part yet. As I said, don't cut any eye, mouth, or nose holes yet. Repeat this step for the mouth and under eye. Remember that the bottom has edges, and needs no riveting.
Still not quite done. Attach all the pieces together. Either sew them together or staple them or if you use light material, consider gluing it together. Next, spray paint it either green, silver, or grey. When done with that, adjust the back. If you have long hair like Mick, use elastic so it will stay on, or you can use straps.